Editing
Our Editor offers a variety of tools to customize your Pagedip, so let your imagination run wild and create a unique Pagedip like no one has ever seen before!
Create a Page
Pages are what hold your content and where you can display your media. When you open a Pagedip, you're automatically taken to the first page in the Page Tree. To view other pages, simply click on the one you'd like to see.
There are two ways to make a new Page depending on if you want it to be a top-level page or a child page. Top-level pages are the main sections of your content, while child pages often provide supporting details and information.
To create a top-level page, click the + Add Page link at the bottom of the Page Tree
To create a child page, hover over the page you'd like the child page to be under, and click the + button
Apart from viewing how your pages are laid out, you can also re-arrange them using our Drag-and-Drop interface. Simply click and drag pages to re-order them as you see fit. You can arrange them in any order or drag a page inside of another, to make it a child page.
After creating a page, you can further customize the page in the Page Settings sidebar. Pagedip provides themes to help in formatting your customized pages. If the theme has page options, you'll be able to modify them here. Example theme page options could be editing the title, adding a sidebar, including a page header, and much more. The Page Settings sidebar is located on the left side of the page editing tab.
WYSIWYG Editor
The WYSIWYG (What You See Is What You Get)[1] Editor is the area of the Writeroom where your text and media come together. We created a powerful WYSIWYG interface that lets you see what your page will look like as you edit it. Below, the various formatting options are explained in detail.
Formatting Options

The formatting options available are all shown in the top bar of the Editor. You can use these options to format your document. You can hover over each option in the Formatting Bar to see its name and the function of each formatting option is detailed below.
Block Style
The Style dropdown is used to set the block type. Options are Paragraph, Header 1-4, and Blockquote.
The Theme Style button (with a paintbrush icon) shows theme specific alternate styling for the selected block type. A theme may or may not have any custom styles. Examples of this could be lead paragraphs, alternate colored headers, or custom styled blockquotes.
The Alignment button allows you to align the content.
Mark Styles
The mark styles allow you to make selected text bold, italic, underlined, small, or highlighted.
Lists
Bulleted Lists and Numbered Lists can be created using the list buttons. The Theme Style button (with a paintbrush icon) shows theme specific alternate styling for the selected list type. A theme may or may not have any custom styles. Examples of this could be numbered lists with larger numbers or a custom color.
Anchor
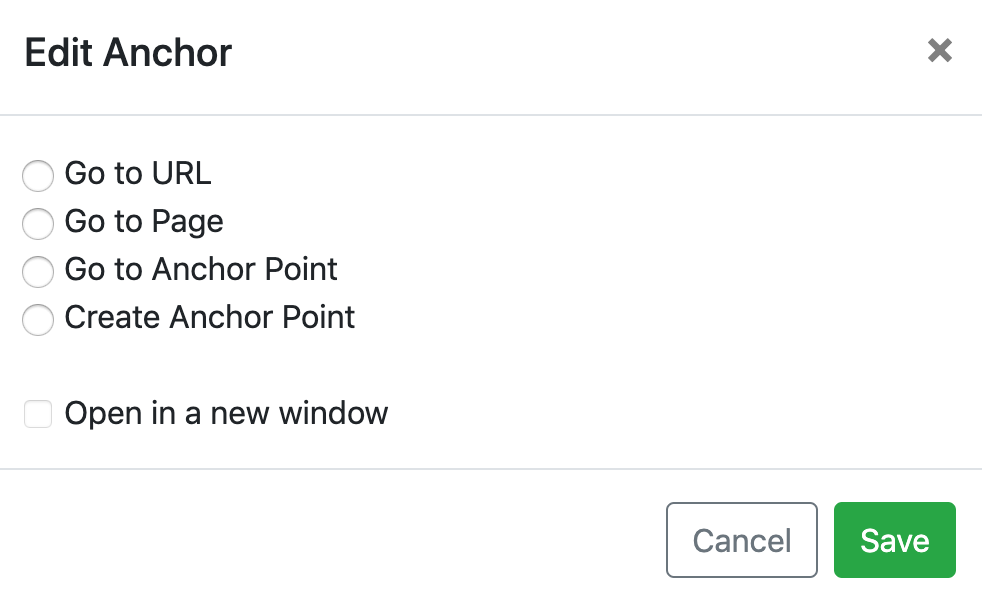
Anchor is similar to a Hyperlink, but it has some added functionality that's unique to Pagedip. To create an Anchor, select the word(s) you'd like to be interactive and click the Anchor button. This brings up a window[2] that lets you set what the Anchor should do.
Go to URL allows you to direct your reader to a URL on the web. Think of this option like a regular hyperlink.
Go to Page allows you to direct your reader to another Pagedip page. When you select the option, you're then presented with a "Mini Page Tree" to select the destination page.
Create an Anchor Point allows you to link to information located on the same page.
Go to Anchor Point allows you to point the user at a custom anchor point that has been created using the Create an Anchor Point.
Bink
If the Bink extension has been enabled then you will see a Bink button. The Bink button allows you to turn a selected word or phrase into a Bink[3]. These can be used to add an additional layer of content to your work. You can use the "Remove Bink" button, which appears after clicking on the created Bink, to remove it without deleting the text to which it is attached.
Note that when you remove a Bink, any content inside it will be deleted.
The Library
You can always go back to your library by clicking on the book icon on the top left corner of your screen. Here you will be able to create new Pagedips or edit existing ones.
What You See Is What You Get (WYSIWYG/ wiziwiɡ/ WIZ-ee-wig) is a type of editing software that allows content to be edited in a form that resembles its appearance when printed or displayed as a finished product.
Binks are an interesting, engaging piece of adjacent content associated with what you're reading made available in-line as telescoping content. Binks can include many different types of information, not just text.